Beginners guide to stamping metal
Stamping metal is a creative and practical way to personalise or add decorative elements to various metal objects. Whether you’re interested in making jewellery, keychains, or customizing household items, metal stamping is a versatile and accessible craft. Here’s a beginner’s guide to help you get started:
 What do you need for Metal Stamping?:
- Metal blanks: These can be flat pieces of metal made from materials like aluminium, brass, copper, or sterling silver. Choose a metal that suits your project.
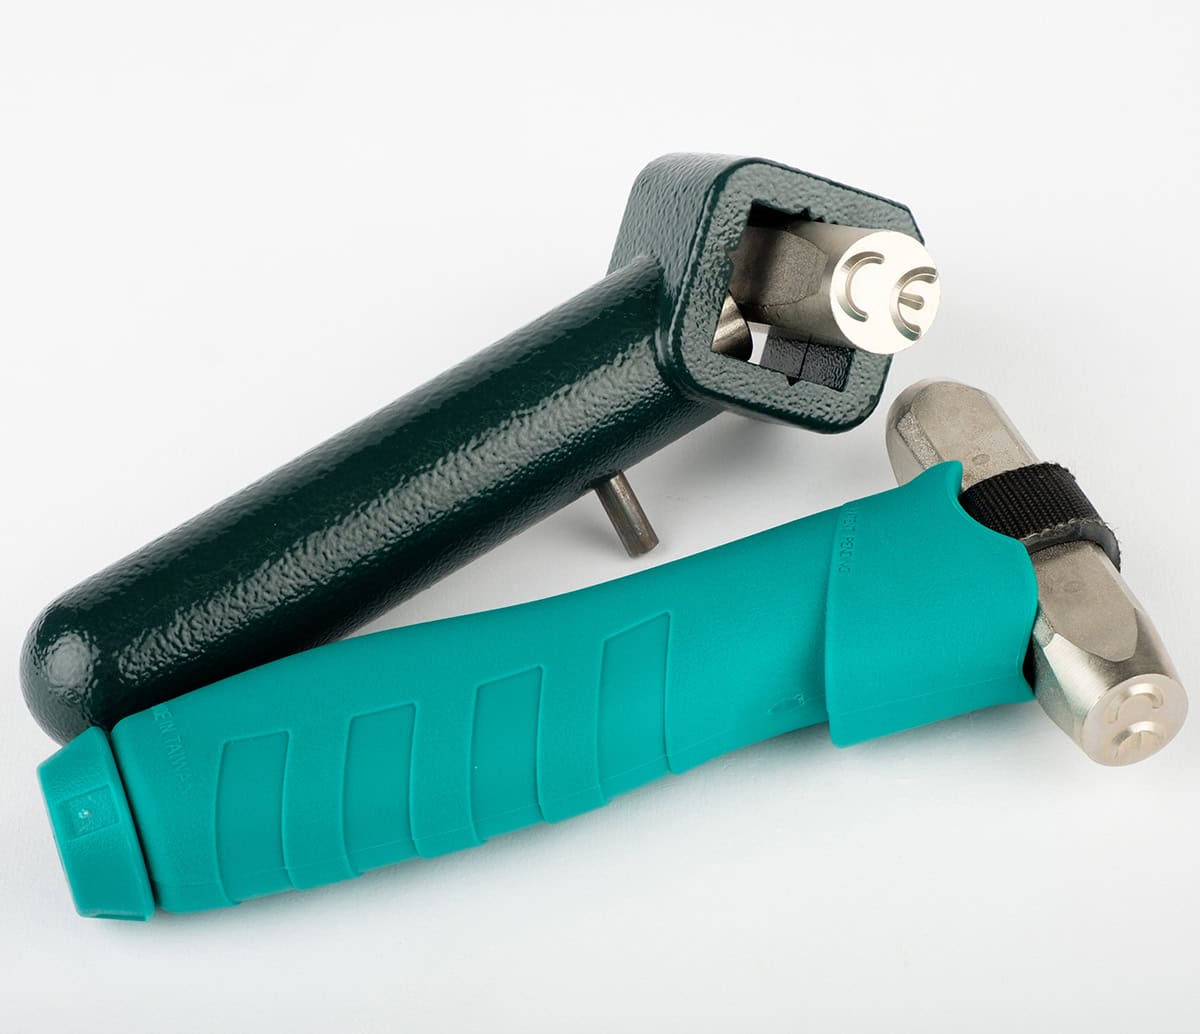
- Metal stamps / punches / type: These are engraved with letters, numbers, or symbols. A wide range of Punches or Stamps are available to buy online from our online store. We’ve been making the equipment to make marks in metal for 175 years, we really are the experts in the field. Pryor’s metal stmps have been heat treated to make them hard wearing and nickel plated to make them corrosion resistant. This combines to make them long lasting. All Pryor Stamps, Type & Punches are made here in Sheffield to our exacting high standards and can be bought online direct from us in our store.
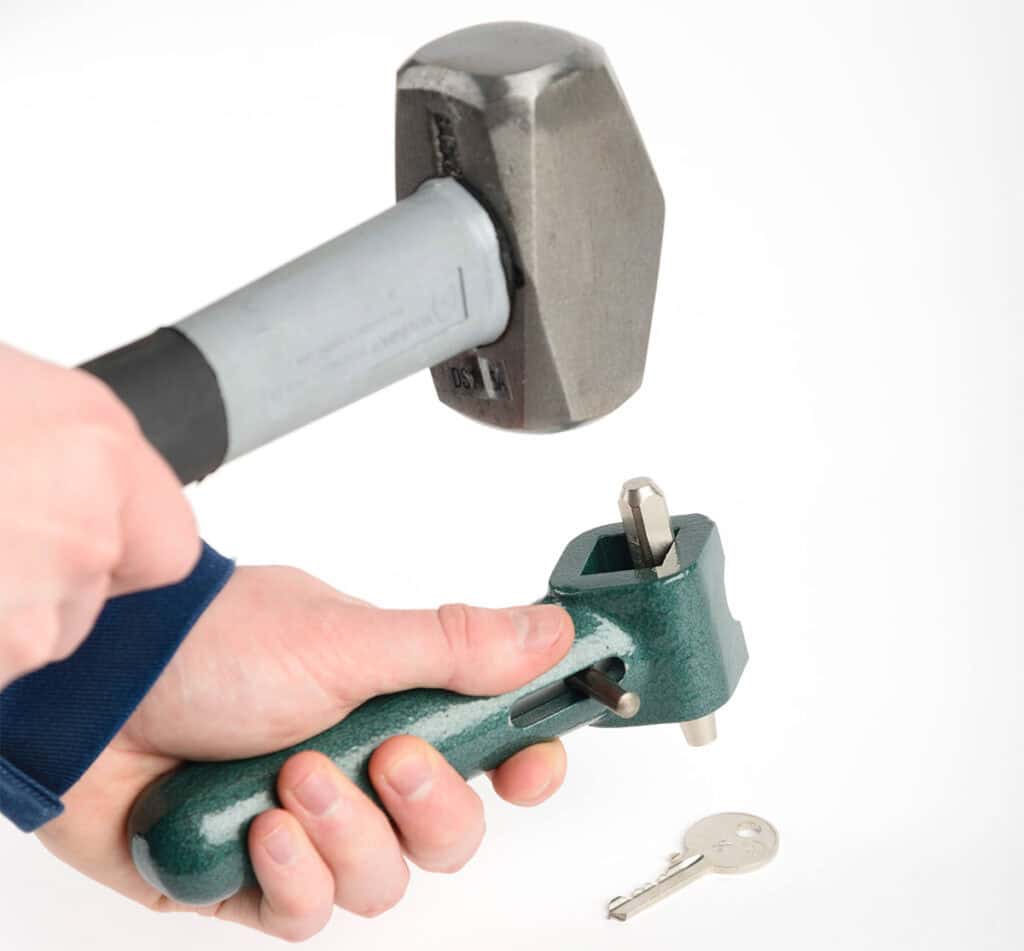
- Hammer: A metal hammer with a flat face is ideal for metal stamping. The weight and size can vary depending on personal preference and the thickness of your metal. You don’t need a special hammer just one which is comfortable, with a flat head and suitable for the size of punch you are striking.
- Safety Grip: We recommend using a safety grip to hold your metal stamp. Hammers are tougher than fingers and it pays to keep your hands safe.
- Steel bench block: This provides a solid surface for stamping and helps create a clear impression. It also protects your work surface from damage. If you don’t have a bench block find a hard flat surface. Your work surface needs to be as sturdy and stable as possible to avoid movement during hammering.
- Masking tape: Use this to secure the metal blank to the bench block. It helps prevent the metal from moving while you stamp. You can also use a strip of masking tape to ensure you stamp in a straight line.
- Marker or stamp guide: If you aren’t using Masking tape to ensure a straight line Mark the area where you want to stamp to ensure accurate placement using a marker or guide.
- Polishing materials: To clean and polish your stamped metal, you may need a polishing cloth or a metal polish.
Step by Step Metal Stamping:
- Prepare Your Workspace:
- Set up a sturdy work surface, preferably on a hard, flat table or bench.
- Place the steel bench block on the work surface.
- Secure your metal blank to the block using masking tape.
- Design Planning:
- Use a marker to mark the area where you want to stamp. Alternatively, use a stamp guide to align your stamps accurately.
- Select and Arrange Stamps:
- Choose the metal stamps you want to use for your design.
- Arrange the stamps in the desired order, considering spacing and alignment.
- Practice:
- Practice on a scrap piece of metal to get a feel for the hammer pressure and stamp placement.
- Stamping:
- Hold the metal stamp firmly and vertically over the marked area.
- Position the stamp where you want the impression and strike it with a consistent force using the hammer.
- For a deeper impression, you may need to strike the stamp more than once.
- Repeat:
- Repeat the process for each stamp in your design.
- Clean and Polish:
- Remove the masking tape and clean the stamped metal with a soft cloth or polishing pad.
- If desired, use a polishing cloth or metal polish to enhance the shine of your stamped design.
- Finish Your Project:
- Incorporate your stamped metal into your desired project, whether it’s jewellery, keychains, or other decorative items.
- Don’t forget to send show us what you’ve been making. We love seeing all of your projects
Remember, practice is key to improving your metal stamping skills. Experiment with different metals, fonts, and designs to create unique and personalized pieces. Have fun and enjoy the creative process!